
ESCAPE FROM TARKOV / INTERACTIVE MAPS & QUEST PLANNER
Go in with a plan.
Know what comes next.
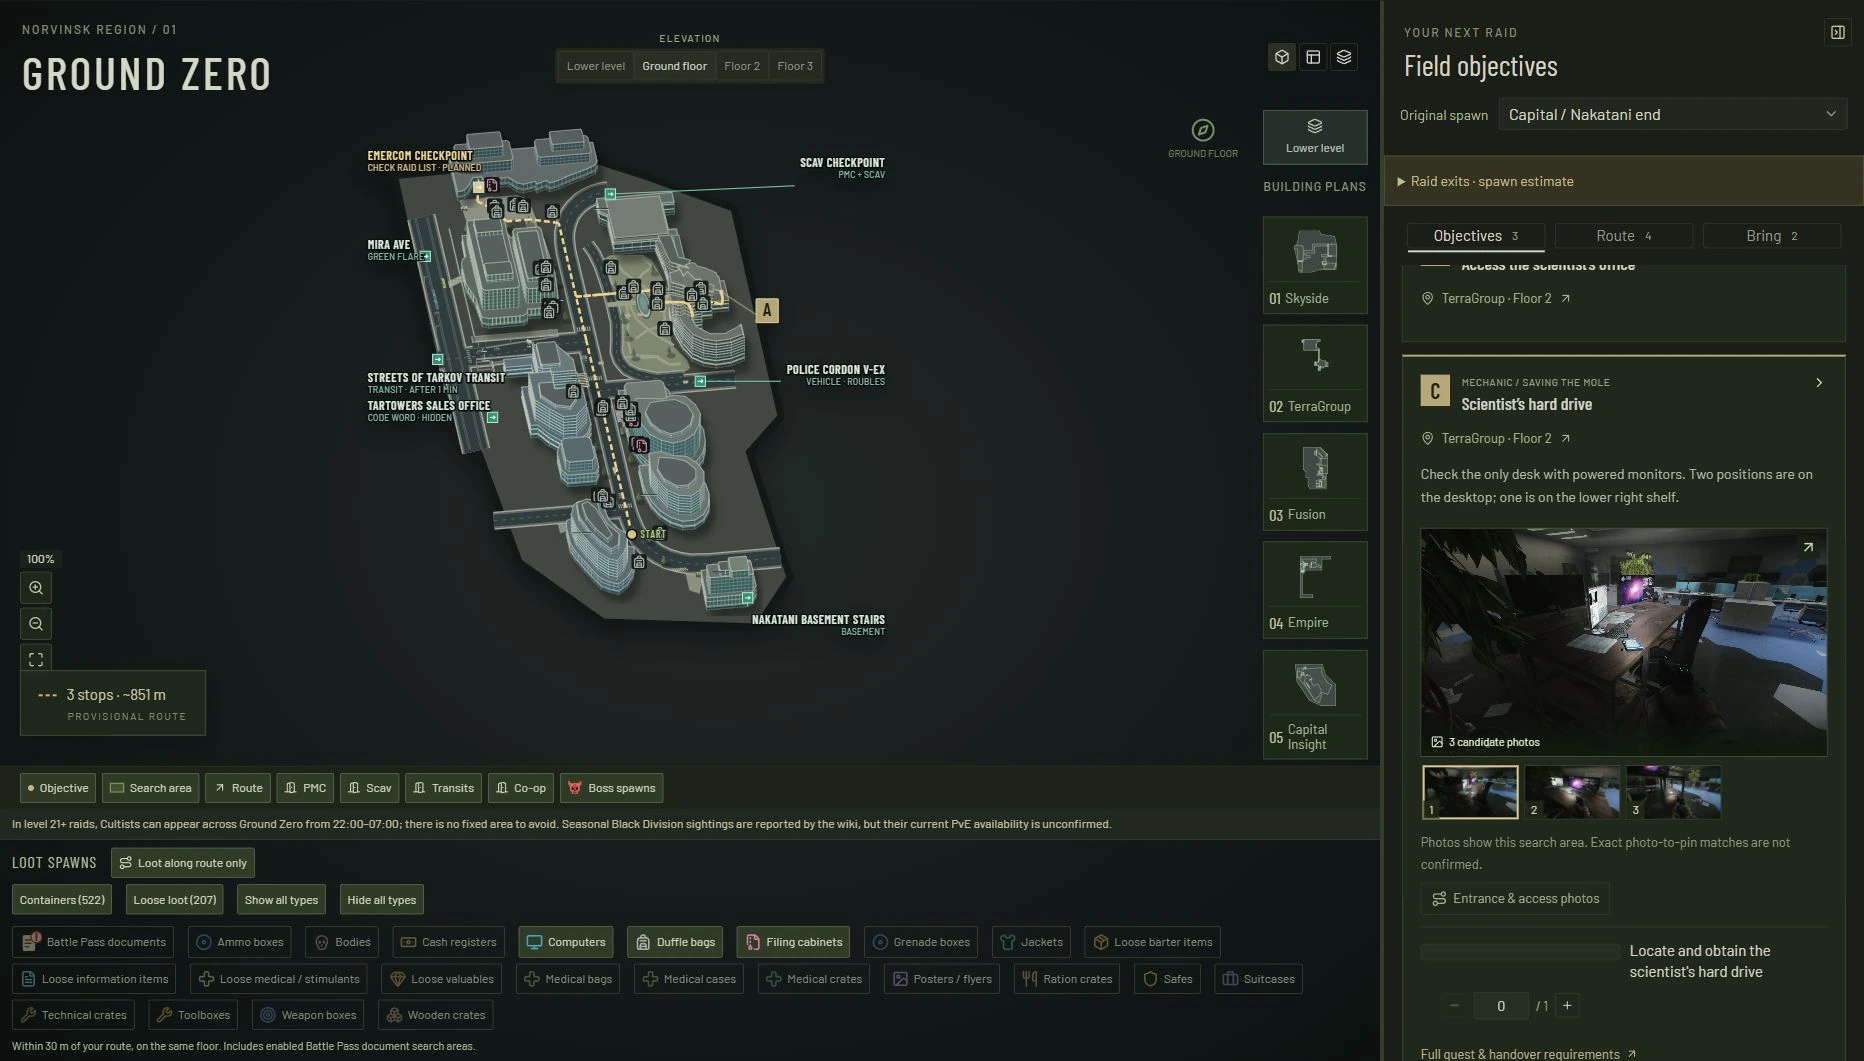
Plan your PvE raids with free Escape from Tarkov interactive maps. Put your active quests on one map, follow a route through their objectives, and find useful loot along the way. EFT Raid Planner brings building floor plans, pickup photos, keys and extraction routes into the same view.
Free to use. No game login. Your progress stays in your browser.
Quest TrackerChoose the quests you have in game.
Interactive mapSee the route, floors and nearby loot.
Objectives GuideCheck each stop, its photos and what to bring.
FROM YOUR QUEST LOG TO YOUR NEXT RAID
How to use the Tarkov quest planner
Set it up once, then make it part of your routine. Here is the full workflow, from your first visit to checking off the last stop.
On a phone, start on the map. Open Quest Tracker from the left, Objectives Guide from the right, or Interactive Map Filters from the bottom. Tap a labeled handle or swipe it inward; opening one panel closes the other. Drag the map to move and pinch to zoom. Landscape gives you more room, and the full workflow also works in portrait.
Import your quest history or set up manually
Start with either path below. Importing recorded quest events can save time; manual setup works without any files. Both keep your progress in this browser and leave you in control of every change.
Recommended: import your game Logs folder
- Find the game folder. In the Battlestate Games Launcher, use the game settings to locate your Escape from Tarkov installation. Its Logs folder contains session folders named log_YYYY.MM.DD_…. Use these game logs, not LauncherLogs.
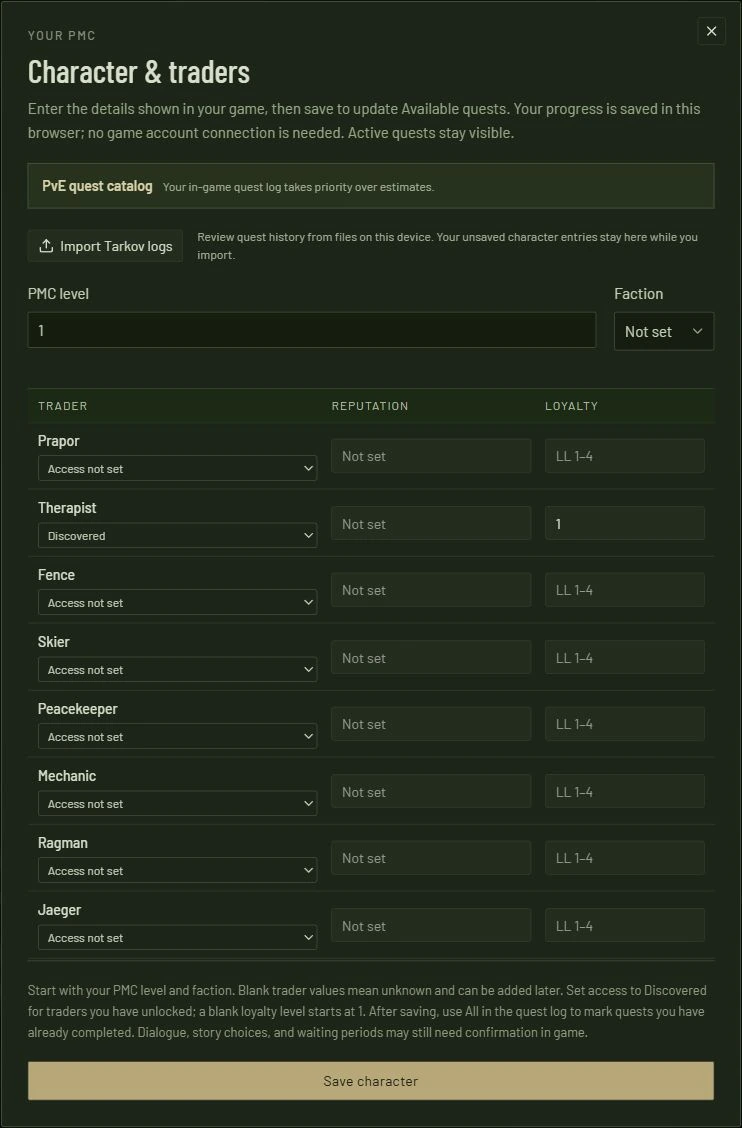
- Select your retained history. In the planner, open Character & traders → Import Tarkov logs. Use the folder option to select the whole Logsdirectory. The importer reads relevant files across its sessions and skips unrelated diagnostics. One session folder or individual notification files also work; keeping session context helps distinguish PvE from other game modes.
- Separate your current character. If the folder includes an older character or reset, set the optional date cutoff. It includes sessions on or after that date and skips files without a recognizable session date. If you reset partway through the chosen day, select individual post-reset session folders instead. Review the excluded counts before continuing.
- Review before applying. Check each proposed Active, Completed or Not active change against your game. Deselect any unwanted changes. Confirm the history belongs to your current PvE character, then choose Apply. The planner downloads one snapshot containing your full planner profile before and after the import; Undo can reverse the change. This preserves planner data, not a complete game save. Files are read on this device and are not uploaded.
- Fill the gaps. Logs contain partial event history, not a complete save. Even the whole Logs folder cannot recreate missing or deleted events, so set remaining quests manually. Missing events never clear other saved quests. Enter your PMC level, faction and trader values separately in Character & traders, then choose Save character.
Alternative: enter everything manually
- Open Character & traders. Enter your PMC level and faction. Mark unlocked traders as Discovered and enter their reputation and loyalty levels, then choose Save character.
- In the quest log, choose All, find the quests you have already finished and use their checkmarks to mark them Completed.
- Find your current in-game assignments and pin them as Active. If the availability estimate differs from your game, open the quest and choose I have this quest.
Returning player? Your saved character and quests load from this browser automatically.
Track your active Tarkov quests
After setup, compare the planner with your current in-game quest log. You can import a newer session whenever you want, or keep updating quest statuses manually. Import is also available under Profile settings and backup.
Use the quest log to mark earlier quests completed and set your current assignments to Active. Search by quest name when you already know what you are looking for. Activating a quest brings its relevant objectives into your selected map’s plan.
The Available list uses your PMC level, trader loyalty and prerequisite quest progress. If a quest is missing, check those values or find it under All. If it is already assigned in your game, open its details and choose I have this quest to track it as active.
Plan a route from your spawn to extraction
Pick a map and your approximate spawn area. You do not need to identify an exact spawn point to begin. Review the proposed objective route and extraction, along with any keys, items or conditions the plan needs.
Match the departure to your actual in-raid extraction list. An exit shown on the map is not automatically available to you. Special maps such as Labyrinth and Terminal use their own guided escape steps instead of an ordinary spawn-to-extract routine.
Find quest objectives with photos and floor plans
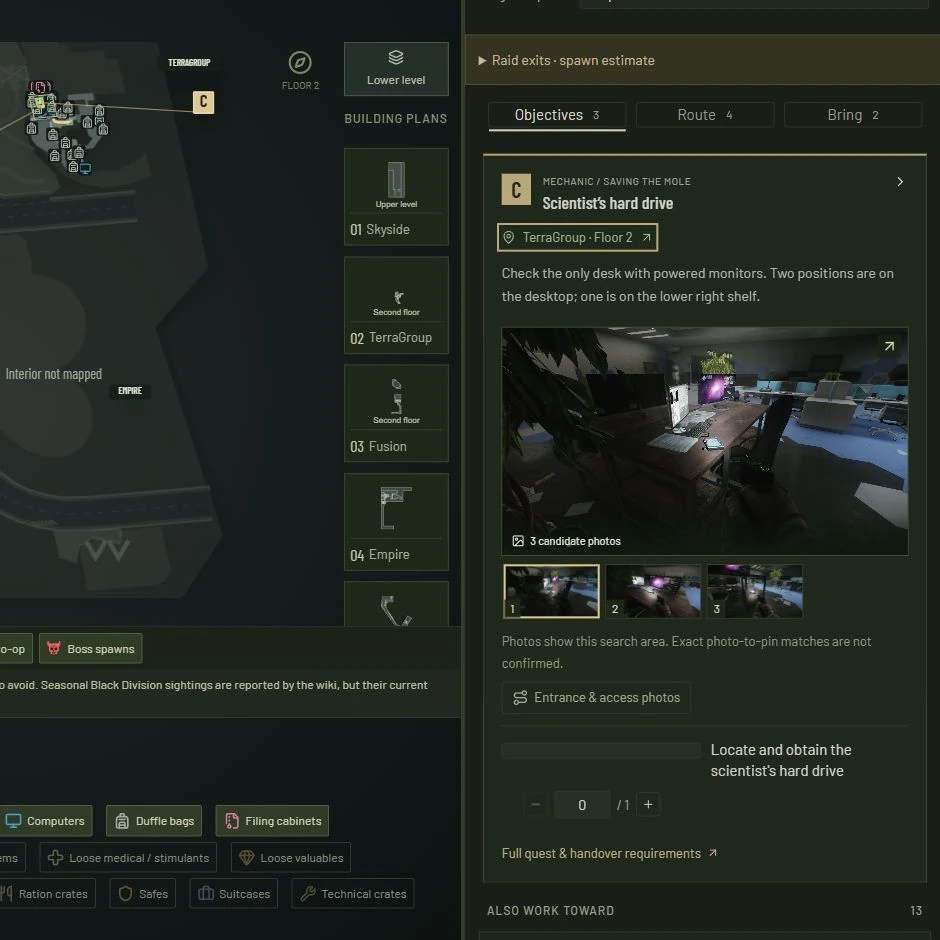
Expand a stop in Objectives Guide to read its directions and inspect the location photographs. Use the Route tab for the sequence and Bring to check required keys and items before you leave your stash.
Click a building on your quest route to open its plan. The relevant objective helps select its floor, and the view can follow your progress through the route. You can also choose a floor yourself and switch between 2D and isometric views.
Pickup and placement galleries use in-game location photos where available. Look through the alternatives when an item has several possible positions; a search-area marker does not promise a drop at every spot.
MAKE THE JOURNEY USEFUL
Find loot along the route you are already taking
Turn on Loot along route only in the map’s loot controls. With a route in place, the filter narrows the enabled loot categories to supported nearby detours on the relevant floor, instead of filling the map with every location at once.
The same filter applies to enabled Battle Pass document search areas. Open a document marker to inspect its location photos, and use the individual legend toggles to keep only the categories you want to see.
On a phone, open Interactive Map Filters from the bottom handle. On desktop, use Hide legend and Show legend to clear or restore the map controls without changing your selected layers.
Record what happened, then prepare the next raid
Check off quest objectives as you complete each action. Checked objectives leave the map and route but remain in the field checklist, so you can uncheck a mistake or a lost item. Keep collecting an item separate from successfully extracting with it, and record full quest completion when appropriate.
Use New raid to clear temporary searched spots, packing checks and observed raid conditions. Items marked collected but not extracted return to the search list; extracted items and completed quests stay recorded.
Using the Tarkov wiki alongside EFT Raid Planner
Use the Tarkov wiki for detailed quest requirements and background, then bring your active assignments into EFT Raid Planner to plan where to go. Quest details link to their source guide, such as Saving the Mole on the Escape from Tarkov Wiki. The planner connects objectives, item-location photos, building floors and extraction routes in one view.
EFT Raid Planner is an independent companion with its own interactive maps. The quest catalog focuses on PvE, and your current in-game quest log and extraction list take priority when source information differs. Choose a map to open its interactive view directly.
YOUR NEXT RAID STARTS HERE
Start with the quests in your log.
Open the planner, import your quest history or set up manually, confirm your character details and choose your map.